1. VMVendor Documentation - Installation
This documentation applies to VMVendor3
Requirements:
- Joomla 3.3+ & Virtuemart 2.9.9e +
I - Installation
To install VMVendor, go to your joomla setup backend at:
http://www.yoursite.com/administrator
Login as a superadministrator and go to the extensions installer page:
http://www.yoursite.com/administrator/index.php?option=com_installer

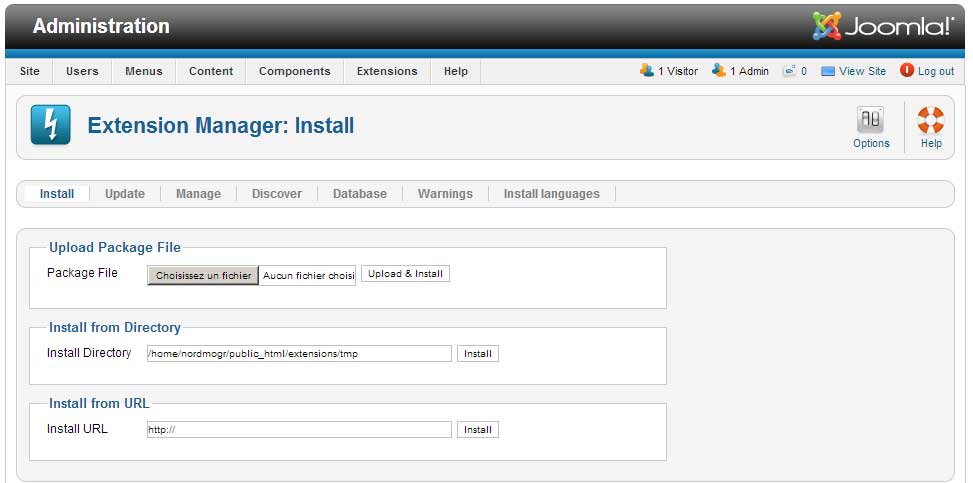
Unzip com_vmvendor_UNZIP_FIRST.zip to a folder and then in the Joomla installer page select the unzipped archive called com_vmvendorX.X.zip (where X.X is the version number).
Then click on 'Upload & Install' Button.
This will upload the necessary files to your server and start the installation process.
Here is what's going to be installed:
Important: This require that you go to Virtuemart VMCUstom field manager and create a new custom field: (type: Plug-ins) and then select this plugin in the plugins list that appeared.
The 3 following extensions need to be installed manually. You'll find these in the provided 'Addons' folder. They have not been added to the automatic process because they are not required and only concern some users.
If you are willing you users to be able to sell digital products such as softwares, mp3 etc... you will need to get the Shipment for digital products from
http://shop.ekerner.com.au/index.php/shop/joomla-extensions/vmcustom-downloadable-detail
Now you got everything installed you could try adding a first product to the shop via the Add Product page from the Vendor Tasks Menu (and automatically become a vendor when adding your first product) but you'll probably like to make some tweaking and browse the various options included in VMVendor.
Setting up the menu items
Just like most other Joomla component , if you want your users to be able to access its pages, you need to add Menu items to your main menu or other enabled menu.
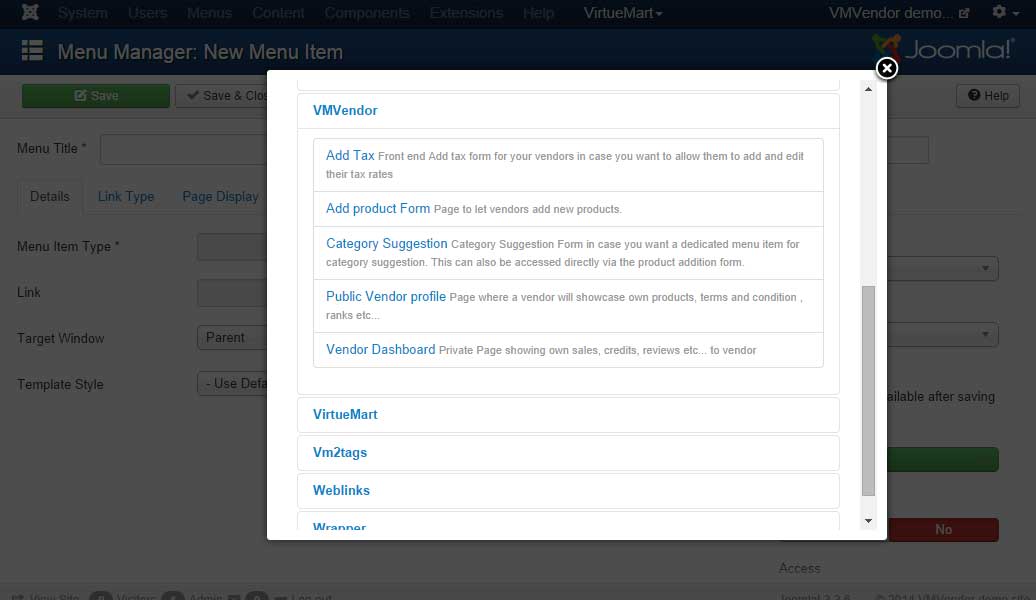
Joomla administration -> Menus -> Main Menu -> Add New Menu Item: Click SELECT


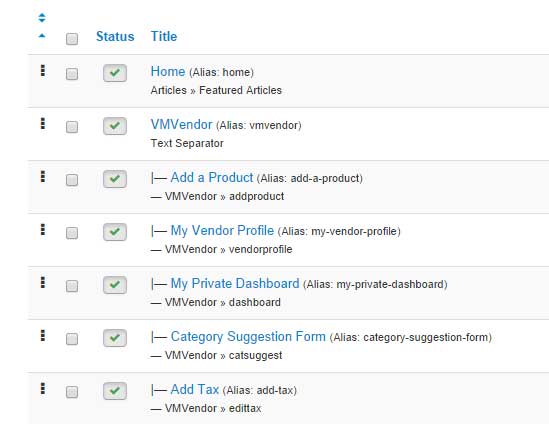
Here is what your menu structure could look like
Now let's set the component options.
Requirements:
- Joomla 3.3+ & Virtuemart 2.9.9e +
I - Installation
To install VMVendor, go to your joomla setup backend at:
http://www.yoursite.com/administrator
Login as a superadministrator and go to the extensions installer page:
http://www.yoursite.com/administrator/index.php?option=com_installer

Unzip com_vmvendor_UNZIP_FIRST.zip to a folder and then in the Joomla installer page select the unzipped archive called com_vmvendorX.X.zip (where X.X is the version number).
Then click on 'Upload & Install' Button.
This will upload the necessary files to your server and start the installation process.
Here is what's going to be installed:
- com_vmvendor : VMVendor main component providing 3 available menu types: Product addition - Vendor public profile - Vendor private dashboard. More features are include such as component views like : Vendor profile edition, product edition, category addition / suggestion , tax edition etc...
- mod_vmvendors : This will display a list of vendors according to some ordering settings.
- plg_vmvendor_vendorlink: A content plugin that shows on product details page to show who added the product, with a link to vendor profile and a replacement of the Ask about this product button that allows customer to ask to vendor instead of asking to site admin.
- plg_vmpayment_points2vendor: This automates AUP points reward to vendors when their products are found as order items inside a confirmed order. It replaces the old order.php file modification required.
- plg_search_vmvendor: This plugins adds searching feature for a Vendor name to the Joomla search.Additional installation
- plg_vmcustom_vmvendorincart: This plugin allows you to create a VMCustom plugin that will be automatically added to VMVendor product on product addition and edition, to display a reference to the vendor name and vendor profile URL in the cart (module and component view) and order (Front and Back end)
Important: This require that you go to Virtuemart VMCUstom field manager and create a new custom field: (type: Plug-ins) and then select this plugin in the plugins list that appeared.
The 3 following extensions need to be installed manually. You'll find these in the provided 'Addons' folder. They have not been added to the automatic process because they are not required and only concern some users.
- plug_cbvmvendor (Only for Community Builder): This is the Profile plugin for Community Builder. Just like the one for Jomsocial. It is located in: com_vmvendor_UNZIPFIRST/com_vmvendorX.X.zip/admin/install/plugins/CB/plug_cbvmvendor.zip . You need to install it via the Community Builder plugins installer and NOT the Joomla installer. The CB installer is located at the bottom of that page: http://yoursite.com/administrator/index.php?option=com_comprofiler&task=showPlugins&view=showPlugins
- plg_vmvendor : This profile plugin shows vendors added products on own Jomsocial profile
- plg_app_user_vmvendor : This profile plugin shows a mini dashboard on own EasySocial profile
If you are willing you users to be able to sell digital products such as softwares, mp3 etc... you will need to get the Shipment for digital products from
http://shop.ekerner.com.au/index.php/shop/joomla-extensions/vmcustom-downloadable-detail
Now you got everything installed you could try adding a first product to the shop via the Add Product page from the Vendor Tasks Menu (and automatically become a vendor when adding your first product) but you'll probably like to make some tweaking and browse the various options included in VMVendor.
Setting up the menu items
Just like most other Joomla component , if you want your users to be able to access its pages, you need to add Menu items to your main menu or other enabled menu.
Joomla administration -> Menus -> Main Menu -> Add New Menu Item: Click SELECT


Here is what your menu structure could look like
The most important menu items are: Product Addition, Vendor Profile and Vendor Dashboard
Important: We recommend you create menu items for all pages you need, so Joomla create specific Menu Item IDs that the component will use to create clean SEF URLs.
Important: We recommend you create menu items for all pages you need, so Joomla create specific Menu Item IDs that the component will use to create clean SEF URLs.
Now let's set the component options.
- Created on .
- Last updated on .

