Itinerary Map Custom Field plugin for Joomla 3.7+ Documentation
Requirement: Joomla 3.7+ | Download
This plg_fields_itin.zip plugin is a new type of plugin extension for Joomla introduced in the 3.7 version: Custom Fields.
This plugin installs via the usual Joomla installer. Go to your Joomla backend at yoursite.com/administrator, login and go to:
TOP MENU > EXTENSIONS > INSTALL > UPLOAD PACKAGE FILE tab
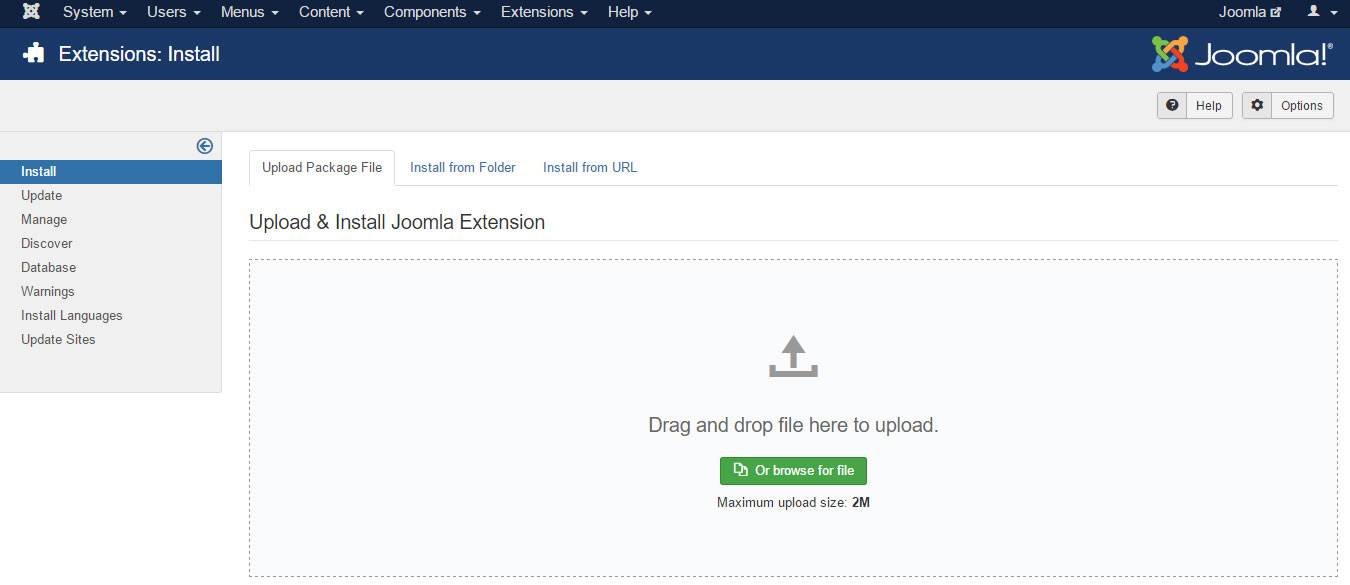
Click the browse button to select the plg_fields_itin.zip archive on your computer.
Click Upload
Once the plugin is uploaded, it installs automatically. You now have to check its global settings. Go to:
TOP MENU > EXTENSIONS > PLUGINS, filter the list by plugin type: FIELDS
And find the GMAP plugin.
As most settings are specific to fields objects, the plugin's global settings are very limited. Only 2 of these:
Google Maps API Key: This is the required key provided by Google so they know how much you use their service so they can check your quota. To get your API Key, go to the Google console API at
https://console.developers.google.com/
Create a project and visit the LIBRARY page. Include these Libraries:
Input the credentials API key to the relative field in our plugin setting.
Now the plugin is set and ready, we can create our first field. Custom Fields are supported by at least 3 components in the Joomla core: com_content (articles), com_users & com_contacts. Choose one of these for your first ITIN Field. Go either to:
TOP MENU > CONTENT > FIELDS (for fields to show in Joomla Articles)
or
TOP MENU > COMPONENTS > CONTACT > FIELDS (for fields to show in a contact page)
or
TOP MENU > USERS > FIELDS (for fields to show in Joomla User profiles)
Click the NEW button, and let's create your first ITIN Custom Field
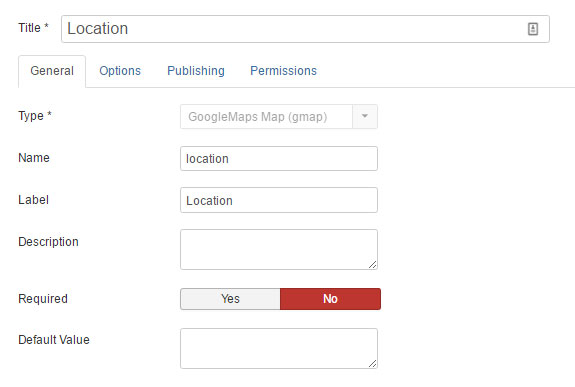
Title: Set a descriptive title for your GMAP field
Type: if the plugin is enabled, your'll find the field: GoogleMaps Map (gmap) plugin type. Select it
Name: this should be filled automatically after saving the field once
Label: Set the label for your field
Description: You can set a description for the field, it will show when a user woul hover the field label with the mouse cursor
Required: Should the user ba able so submit the form without setting the field
Default Value: Don't set it here. Default values are to be set in the following section
Form Settings sectionThis section shows settings for the form field map.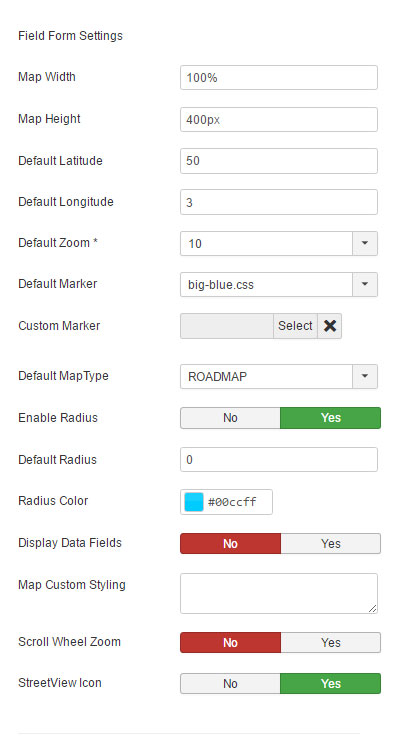
Map Width: set the width of the form map. Don't forget to specify % or px units
Map Height: set the height of the form map. Don't forget to specify px unit
Default Latitude & Default Longitude: Default coordinates to load the form map
Default Maptype: Select the default maptype for the backend
Map Custom Styling: You can customize the map layout colors. This will override your MAPTYPE setting in the previous parameter. Basicaly you need to paste in this field, the JSON code you get on https://mapstyle.withgoogle.com/
INTRODUCTION
This plg_fields_itin.zip plugin is a new type of plugin extension for Joomla introduced in the 3.7 version: Custom Fields.
INSTALLATION
This plugin installs via the usual Joomla installer. Go to your Joomla backend at yoursite.com/administrator, login and go to:
TOP MENU > EXTENSIONS > INSTALL > UPLOAD PACKAGE FILE tab
Click the browse button to select the plg_fields_itin.zip archive on your computer.
Click Upload
PLUGIN SETUP
Once the plugin is uploaded, it installs automatically. You now have to check its global settings. Go to:
TOP MENU > EXTENSIONS > PLUGINS, filter the list by plugin type: FIELDS
And find the GMAP plugin.
As most settings are specific to fields objects, the plugin's global settings are very limited. Only 2 of these:
Google Maps API Key: This is the required key provided by Google so they know how much you use their service so they can check your quota. To get your API Key, go to the Google console API at
https://console.developers.google.com/
Create a project and visit the LIBRARY page. Include these Libraries:
- Mandatory: Google Maps JavaScript API: Required to render the map used to set a location, clicking on the map overlay and / or dragging markers
- Mandatory: Google Places API Web Service: Required to be able to move the locator map to specific addresses
- Optional: Elevation Maps API
Input the credentials API key to the relative field in our plugin setting.
FIRST FIELD CREATION
Now the plugin is set and ready, we can create our first field. Custom Fields are supported by at least 3 components in the Joomla core: com_content (articles), com_users & com_contacts. Choose one of these for your first ITIN Field. Go either to:
TOP MENU > CONTENT > FIELDS (for fields to show in Joomla Articles)
or
TOP MENU > COMPONENTS > CONTACT > FIELDS (for fields to show in a contact page)
or
TOP MENU > USERS > FIELDS (for fields to show in Joomla User profiles)
Click the NEW button, and let's create your first ITIN Custom Field
Title: Set a descriptive title for your GMAP field
Type: if the plugin is enabled, your'll find the field: GoogleMaps Map (gmap) plugin type. Select it
Name: this should be filled automatically after saving the field once
Label: Set the label for your field
Description: You can set a description for the field, it will show when a user woul hover the field label with the mouse cursor
Required: Should the user ba able so submit the form without setting the field
Default Value: Don't set it here. Default values are to be set in the following section
Form Settings sectionThis section shows settings for the form field map.
Map Width: set the width of the form map. Don't forget to specify % or px units
Map Height: set the height of the form map. Don't forget to specify px unit
Default Latitude & Default Longitude: Default coordinates to load the form map
Default Maptype: Select the default maptype for the backend
Map Custom Styling: You can customize the map layout colors. This will override your MAPTYPE setting in the previous parameter. Basicaly you need to paste in this field, the JSON code you get on https://mapstyle.withgoogle.com/
- Created on .
- Last updated on .
